


How To Grant Access to Google Tag Manager
Before you read on, make sure you already have a Google Tag Manager account. This article will be explaining how to grant a new user access to an existing account, rather than how to create one.
Like with Google’s other platforms, you’re able to grant someone access to your Google Tag Manager account, such as a digital agency or colleague. There are many different levels of access to choose from which may seem confusing if you haven’t had much experience on the platform – but don’t worry! We’ll take you through it.
When granting access to a Google Tag Manager account, you are able to give Account Permissions and/or Container Permissions, but what’s the difference?
Types of account permissions
An account holds different containers, with the ability to edit user settings.
- User – grants the ability to view account settings, activity and user management, however will not have any access to the containers within the account
- Admin – grants the ability to view and edit account settings, activity and user management, with automatic ‘read’ access to all containers within the account
Types of container permissions
A container will hold all the tags, triggers and variables for a particular website.
- Read – users have the ability to view the container, but not make any edits
- Edit – users can add and change tags within the container
- Approve – users have more rights to make edits, create versions and workspaces, but cannot publish a container
- Publish – users have full rights and the ability to publish containers (make changes live on your website)
How to give account permissions
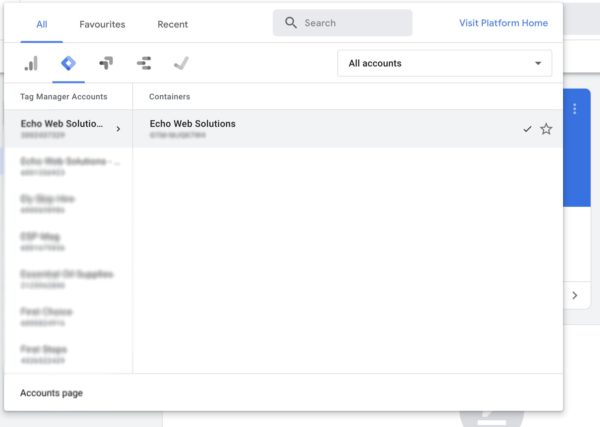
Click on the top right drop down to choose the correct account you would like to grant access to.
2. Find user management
Click on ‘admin‘ and then click on ‘user management‘ under the Account column.

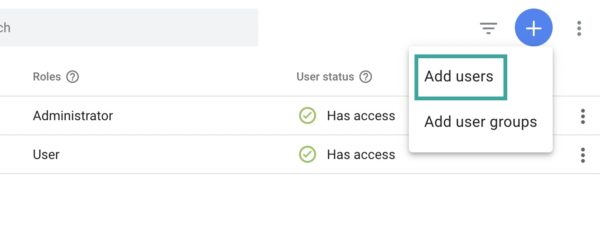
3. Add a new user (or edit an existing one)
At the top right, you will see a plus sign in a blue circle. Click it, then select ‘add users‘. You can also edit permissions for an existing user from this screen.
 3. Add the user’s details and choose their level of access
Fill out the details for your new user, including their email address. Here, you can grant them ‘user‘ or ‘administrator‘ access. Check the suitable box. If you’re happy with the automatic container permissions this will give the user, click ‘invitation‘ in the top right corner – then you’re done!
If you want to set specific container permissions, continue on to the next step.

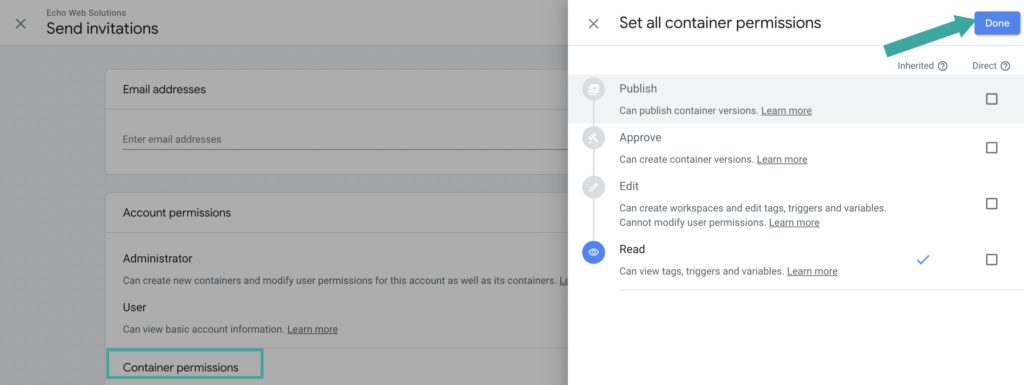
4. Set specific container permissions
If you want to set different or specific container permissions for this user, click ‘set all‘ on the ‘container permissions‘ row. You’ll have a choice of check box options to choose from, which are listed and explained at the top of this Get Help article.
Once you are happy, click ‘done‘ and then continue on to click ‘invitation‘, shown on the previous step.
How to give container permissions
The steps are the same as above, however when you land on the ‘admin‘ page, click on ‘user management‘ in the Container column.

You can now tell the user that they should have an invitation email sitting in their inbox!
